How to Load DefleMask DMP Presets on a Hardware YM2612 Synth (DAFM Genesis Guide)
You’ve spent an evening in DefleMask crafting the perfect slap bass for your next Mega Drive-style track. It sounds great in the tracker… but what would it sound like coming out of a real Yamaha chip, through a real DAC, played from your MIDI keyboard? Good news: with the DAFM synth GENESIS you don’t have to wonder. It reads and writes DefleMask DMP presets straight from an SD card, so your instruments can travel from software to hardware and back again.
In this guide we’ll show you how to load DMP presets on a hardware YM2612 (or YM3438) synth, step by step, based on the DAFM synth GENESIS user manual (firmware v1.98).
What Is a DefleMask DMP File?
DMP stands for DefleMask Preset, the instrument format of the popular multi-system chiptune tracker DefleMask. A DMP file is tiny: according to the official DMP specification, it starts with a version byte, a byte that identifies the target system (Genesis is 0x02) and a byte that says whether it’s an FM or a “standard” instrument. For an FM instrument on the Genesis, the rest of the file stores exactly the parameters the YM2612 understands:
Per channel: algorithm (ALG), feedback (FB), LFO frequency sensitivity (FMS) and amplitude sensitivity (AMS).
Per operator (×4): multiplier (MULT), total level (TL), attack, decay, sustain level, release, AM on/off, rate scaling, detune, second decay rate (D2R) and SSG-EG.
If those names look familiar, it’s because they are the same controls you edit across the DAFM synth’s menus: feedback and algorithm, frequency ratio and detune, ADSR envelope, LFO and SSG-EG. A DMP is basically a snapshot of one FM voice, which makes it a perfect bridge between a tracker and real hardware. Not sure whether your synth has a YM2612 or a YM3438 and what difference it makes? Read YM2612 vs YM3438: The Ladder Effect Explained.
What You’ll Need
A DAFM synth GENESIS (assembled or DIY kit), ideally on the latest firmware from our Resources page, where you’ll also find the full user manual.
An SD card and a card reader for your computer.
Some DMP presets for the Genesis, made by you or downloaded (see Step 1).
Optional: a MIDI keyboard, sequencer or DAW connected to the synth’s MIDI input, if you want to use the 128-preset bank (Step 4).
Step 1: Create or Find Your DMP Presets
There are several ways to get Genesis DMP files:
DefleMask: start a song with the Genesis system, create an FM instrument in the Instrument List and shape it in the Instrument Editor. The Instrument List has buttons to load and save instruments; saving gives you a .dmp file. DefleMask can also load other FM patch formats (such as .tfi, .vgi or .y12) into the list.
Furnace: the open-source tracker Furnace can load and save .dmp instruments too.
DAFMExplorer: our free, open-source preset browser maps 93,000+ presets from the Sega Genesis era. Fill its 6 memory slots with sounds you like and download your bank as DMP files, ready for the DAFM. Read the story behind it in Exploring the Sonic Universe: When FM Synthesis Meets Data Science.
New to building FM instruments in DefleMask? This tutorial is a great place to start:
Video: “How to Make 16-Bit SEGA Genesis / Mega Drive Music With DefleMask” by Matthew Ivic (YouTube)
Step 2: Name Your Files and Prepare the SD Card
The DAFM synth GENESIS finds presets by their file names, so this is the step that matters most. There are two ways to use the card, and you can prepare both on the same SD card:
Method
File names
How you load them
A. Six-patch set
patch01.dmp … patch06.dmp, in the root of the card
From the front panel (menu 6), straight into the 6 MIDI channels
B. Bank 1 library
instr000.dmp … instr127.dmp, in the root of the card
Via MIDI: Bank Select + Program Change (up to 128 presets)
Rename your DMP files on your computer, copy them to the card and insert it into the synth. Here’s a tip straight from the manual: SD cards are cheap, so you can prepare several cards, each with a different set of six patches, and swap them on the fly.
Step 3: Load a Six-Patch Set from the Front Panel
Navigation on the DAFM is simple: turn the right knob to move through the menus and press the right switch to confirm; the left switch cancels. Go to menu 6 (FM patches and MIDI channels):
Use the third submenu to load the six presets from the SD card (patch01.dmp to patch06.dmp) into the synth’s six MIDI channels. The files must sit in the root of the card and use a lowercase .dmp extension.
Use the first submenu to load one of those channel presets (shown as unfilled circles) so you can play it on the touch keyboard and tweak its parameters locally. The filled circles are the bank 0 presets taken from classic Genesis games.
Shortcut: hold the left switch and touch keys 1 to 6 on the keyboard to load the preset stored in that MIDI channel.
From there, each MIDI channel 1–6 plays its own preset, so you can sequence a full six-part arrangement from your DAW.
🎹 Hear your tracker instruments on real Yamaha silicon. The DAFM synth GENESIS is handmade in Santander, Spain, with a genuine YM2612 or YM3438 inside, an SD card slot for DMP presets and full MIDI CC control. Build-it-yourself fans can grab the DIY kit. Also available at Perfect Circuit.
Step 4: Load Up to 128 Presets from Bank 1 via MIDI
Six patches not enough? The DAFM has two preset banks: bank 0 holds the curated presets from the games, and bank 1 reads up to 128 of your own DMP files from the SD card. With your instr000.dmp–instr127.dmp files in the root of the card:
Send CC 0 (Bank Select MSB) with value 1 to switch to bank 1.
Send a Program Change with a value from 0 to 127 on the MIDI channel you want to load. Program Change 5, for example, loads instr005.dmp into that channel.
To get back to the game presets, send CC 0 with value 0 and pick a bank 0 preset with a Program Change (for instance, 0 is the Green Hill Zone bass from Sonic the Hedgehog).
Because this is plain MIDI, you can store the Bank Select and Program Change messages at the start of each part in your DAW, so every song recalls its own sounds automatically. Want to know where those bank 0 sounds come from? Discover the composers in The Soundscape of Sega Genesis: Japanese Composers Who Defined an Era.
Step 5: Tweak, Save and Send Your Sounds Back to DefleMask
The workflow goes both ways. Once a preset is loaded you can reshape it with the knobs, or with MIDI CC messages, since every YM2612/YM3438 parameter is mapped to a CC, and then keep it:
Save to a MIDI channel: use the second submenu of menu 6, or the shortcut hold the right switch and touch keys 1 to 6.
Save to the SD card: the fourth submenu copies all six MIDI channel presets to the card at once, named patch01.DMP to patch06.DMP.
Open them in DefleMask: the manual recommends renaming the files with a lowercase extension (patch01.dmp and so on) before loading them in DefleMask.
That closes the loop: sketch in the tracker, perform and fine-tune on hardware, then take the improved patch back to your song.
Need a refresher on the DAFM’s controls before you start tweaking? Here’s a quick look at menu 1 (feedback and algorithm):
DAFM SYNTH – Genesis YM2612 / YM3438 – MENU 1/6 (Kasser Synths on YouTube)
Troubleshooting: If a Preset Won’t Load
Check the file names.patch01.dmp–patch06.dmp for the six-patch set; instr000.dmp–instr127.dmp (always three digits) for bank 1. All files go in the root of the card, and the extension must be lowercase .dmp, not .DMP.
Check the format. Use FM instruments made for the Genesis/YM2612 system.
Try a different SD card. If loading or saving still fails, the manual suggests swapping the card.
Check your MIDI setup. Make sure you send Bank Select and Program Change on the channel you want to change.
Still stuck? Get in touch through our contact page. We’re happy to help.
From Tracker to Real Hardware
Loading DefleMask DMP presets on a hardware YM2612 synth comes down to three things: the right file names, the right place on the SD card, and either a trip to menu 6 or a Bank Select plus Program Change. Once that clicks, every instrument you’ve ever built in a tracker, and every sound you discover in DAFMExplorer, is one SD card away from real Yamaha FM.
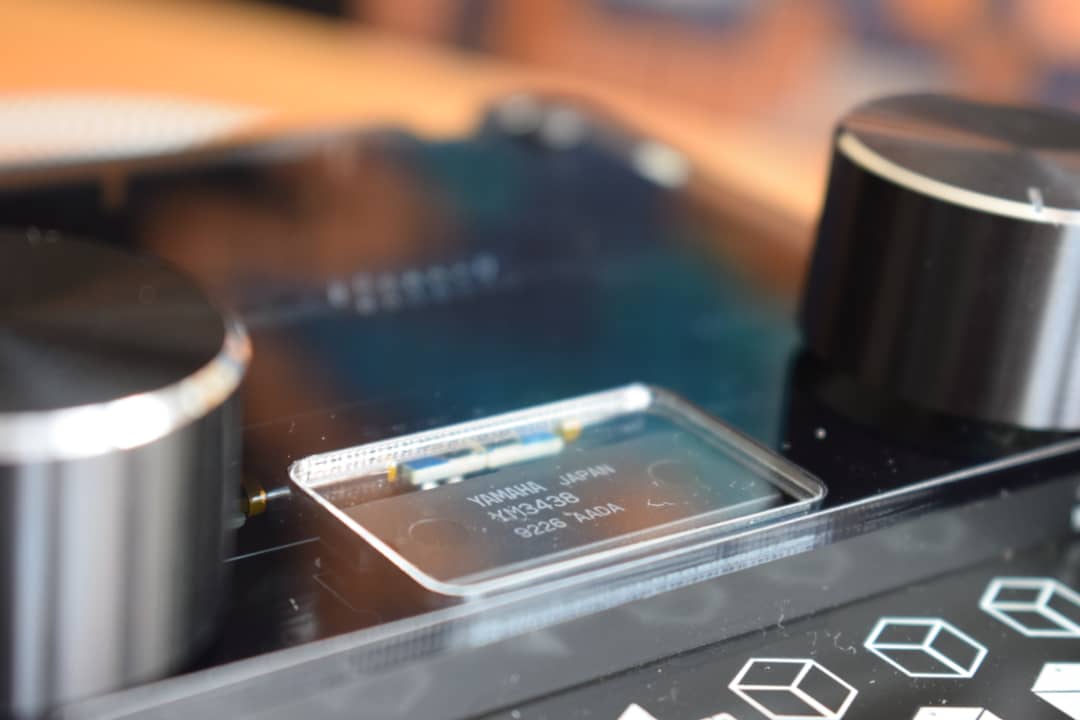
Real Yamaha silicon: a YM3438 inside the DAFM synth GENESIS.
Take your DefleMask instruments out of the computer and into real hardware!
Este sitio web utiliza cookies propias y de terceros para el correcto funcionamiento, análisis de la navegación y visualización por parte del usuario. Si continúa navegando, entenderemos que acepta su uso.
Se recomienda al usuario que lea atentamente esta Política de Cookies para informarse sobre el uso responsable que la página web hace de ellas y sobre las opciones que el usuario tiene para configurar su navegador y gestionarlas. Leer política de cookies
Cookies necesarias
Las cookies necesarias son absolutamente esenciales para que el sitio web funcione correctamente. Esta categoría solo incluye cookies que garantizan funcionalidades básicas y características de seguridad del sitio web. Estas cookies no almacenan ninguna información personal.
Las cookies necesarias que se utilizan en esta web son:
_PHPSESSID: Esta Cookie es usada por el lenguaje de encriptado PHP para permitir que las variables de sesión sean guardadas en el servidor web. Esta cookie es esencial para el funcionamiento del sitio web.
cmoove_gdpr_popup: Cookie técnica y necesaria que contiene el valor de si se ha aceptado la política de cookies.
mfn-builder: Esta cookie técnica y necesaria es usada por el tema de la web para cargar los contenidos de manera estructurada.
Si desactivas estas cookies no podremos guardar tus preferencias. Esto significa que cada vez que visites esta web tendrás que activar o desactivar las cookies de nuevo.
Cookies no necesarias
Cualquier cookie que no sea particularmente necesaria para que el sitio web funcione y se use específicamente para recopilar datos personales del usuario a través de análisis, anuncios y otros contenidos integrados se denominan cookies no necesarias. Es obligatorio obtener el consentimiento del usuario antes de ejecutar estas cookies en su sitio web.
Las cookies no necesarias que se utilizan en esta web son:
_ga: se utiliza para distinguir los usuarios que acceden al sitio web.
_ga_*: se utiliza para generar datos estadísticos acerca de cómo utiliza el usuario el sitio web.
¡Por favor, activa primero las cookies estrictamente necesarias para que podamos guardar tus preferencias!